
Retargeting
indigitall SDK for retargeting clicking here
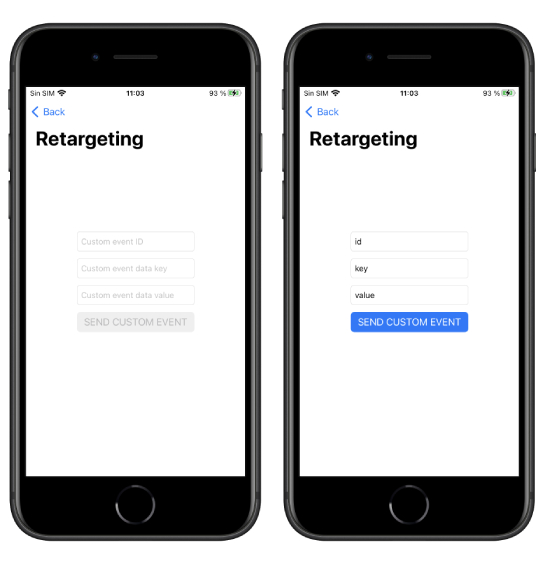
Your app can send information to indigitall's servers to identify the actions and events that happen in it. This allows you to automate retargeting actions.
To register these events, call the sendCustomEvent method, passing a descriptive ID as a parameter (you can invent the one you like the most) and set data you need.
Indigitall.sendCustomEvent("YOUR_CUSTOM_EVENT", customData: []) {
   // Do something in success function
} onError: { (error) in
    //ERRROR DO SOMETHING
}
[Indigitall sendCustomEvent:@"" customData:@[] onSuccess:^{
// Do something in success function
} onError:^(INError * _Nonnull error) {
//ERROR DO SOMETHING
}];
Segments/Topics
indigitall SDK for segments clicking here
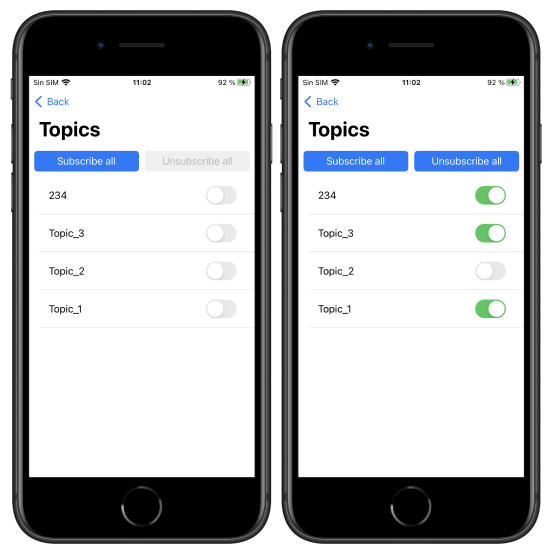
Our SDK allows you to classify users into different customizable groups. This is very useful for:
- Implement a preferences screen so that the user can choose the topics for which they want to receive notifications.
- Label according to the navigation or actions that the user performs.
- Segment communications according to whether the user has identified or is anonymous.
- Segment based on language, culture, customer category, or based on any other criteria you need.
Remember that you must first define the groups you want to work with in the indigitall console
(Tools> Topics).
List groups
Use the topicsList method to get the list of groups that are configured in your indigitall project. The callback of this method receives as a parameter an array of INTopics, which contains the information of all the available groups, as well as a flag that indicates whether the user is included in any of them.
Indigitall.topicsListWith(onSuccess: { (topics) in
        print("TOPICS: \(topics)")
    }) { (error) in
        print("Error: \(error.message)")
    }
[Indigitall topicsListWithOnSuccess:^(NSArray<INTopic *> * _Nonnull topics) {
        NSLog(@"TOPICS: %@",topics);
    } onError:^(INError * _Nonnull error) {
        NSLog(@"ERROR: %@", error.message);
    }];
Manage subscription
To manage the device subscription to one or more groups, there are two methods: subscribe and unsubscribe.
Optionally, both receive a TopicsCallback object as the third parameter, which will return the list of all Topic in the project.
Indigitall.topicsSubscribe(withTopic: [Topic.code, Topic.code], onSuccess: { (topics) in
        self?.topics = topics
    }) { (error) in
        print(error.message)
    }

Indigitall.topicsUnSubscribe(withTopic: [Topic.code, Topic.code], onSuccess: { (topics) in
        self?.topics = topics
    }) { (error) in
        print(error.message)
    }
[Indigitall topicsSubscribeWithTopic:@[Topic[0], Topic[1]] onSuccess:^(NSArray<INTopic *> * _Nonnull topics) {
        topics = topics.self;
    } onError:^(INError * _Nonnull error) {
        NSLog(@"ERROR: %@", error.message);
    }];
[Indigitall topicsUnSubscribeWithTopic:@[Topic[0], Topic[1]] onSuccess:^(NSArray<INTopic *> * _Nonnull topics) {
        topics = topics.self;
    } onError:^(INError * _Nonnull error) {
        NSLog(@"ERROR: %@", error.message);
    }];
Collection of push data
In the event that you would like to obtain the push object of type json to carry out checks or actions that your application requires, we leave you this code that will help to obtain it:
@available(iOS 10.0, *)
func userNotificationCenter(_ center: UNUserNotificationCenter, didReceive response: UNNotificationResponse, withCompletionHandler completionHandler: @escaping () -> Void) {
    Indigitall.handle(with: response ,withCompletionHandler: { (push, action) in
        print("Push object:", push)
        print("Push action app:", action.app)
    })
}

//@DEPRECATED
func application(_ application: UIApplication, didReceiveRemoteNotification userInfo: [AnyHashable : Any], fetchCompletionHandler completionHandler: @escaping (UIBackgroundFetchResult) -> Void) {
    print("Push notification received: \(userInfo)")
    let data = userInfo["data"]
    let push = INPush(data as! NSMutableDictionary)
    print("Push object : \(push)")
- (void) userNotificationCenter:(UNUserNotificationCenter *)center didReceiveNotificationResponse:(UNNotificationResponse *)response withCompletionHandler:(void (^)(void))completionHandler{
    [Indigitall handleWithResponse:response withCompletionHandler:^(INPush * _Nonnull push, INPushAction * _Nonnull action) {
        NSLog(@"Push object: %@", push);
        NSLog(@"Push object app: %@", action.app);
    }];
}

//@DEPRECATED
- (void) application:(UIApplication *)application didReceiveRemoteNotification:(nonnull NSDictionary *)userInfo fetchCompletionHandler:(nonnull void (^)(UIBackgroundFetchResult))completionHandler{
    NSLog(@"Push notification received: %@", userInfo);
    NSMutableDictionary *data = userInfo[@"data"];
    INPush *push = [[INPush alloc]init:data];
    NSLog(@"Push object: %@",push);
}
Register statistics if the Push action is involved
If you decide to treat the action of the Push independently without going through our SDK, once the push has been collected as explained in the previous section, in the userNotificationCenter: didReceive method of the AppDelegate itself, in order to record the statistics you must add the next method.
Indigitall.registerStatistics(response)
[Indigitall registesStatistics: response];
Push Secure Received Event
Only on API use of Push Secure Sending
If you want to receive an event that indicate if the push comes with sendEventAck flag and the encrypted pushes are active, add the following on AppDelegate on didReceived method:
func application(_ application: UIApplication, didReceiveRemoteNotification userInfo: [AnyHashable: Any], fetchCompletionHandler completionHandler: @escaping (UIBackgroundFetchResult) -> Void) {
  Indigitall.didReceivePush(withNotification: userInfo) { push in
    print("Push notification with push secure: \(push.pushId)")
  }
}
Live Activities
A Live Activity displays up-to-date information from your app, allowing people to view the progress of events or tasks at a glance.
Live Activities help people keep track of tasks and events they care about, offering persistent locations for displaying information that updates frequently. For example, a food delivery app could display the time remaining until a food order arrives, or a sports app could display the score for an ongoing game.
In addition to displaying a Live Activity on the Lock Screen, devices that support Live Activities can display your app information in different ways, depending on whether the device supports the Dynamic Island.
On devices that support the Dynamic Island, the system displays Live Activities in a persistent location around the TrueDepth camera.
On devices that don’t support the Dynamic Island, the system can display a Live Activity update in a banner that appears briefly at the top of the screen.
Live Activities appear in highly visible locations and extend your app’s reach to the Lock Screen, in the Dynamic Island, and as an overlay at the top of the screen. To ensure a Live Activity works well on all devices that support it, in all system-determined presentations, and that it feels like a natural extension of your app, you must support the following presentation types.
For developer guidance, see ActivityKit.
Compact: In the Dynamic Island, the system uses the compact presentation when there’s only one Live Activity that’s currently active. The compact presentation is composed of two separate presentations: one that displays on the leading side of the TrueDepth camera and one that displays on the trailing side. Although the leading and trailing presentations are separate views, they form a cohesive view in the Dynamic Island, representing a single piece of information from your app. People can tap a compact Live Activity to open the app and get more details about the event or task.
You can continue to see the different appearances:
- Discover Live Activities Interface
- Displaying live data with Live Activities: More info
- To update or ending your live activity with push notification, you can follow this documentation
Our push model to get the information to update the data is the following:
action =     {
  destroy = 1;
  type = <ACTION_TYPE>;
};
appKey = "<YOUR_APPKEY>";
title = "<PUSH_TITLE>";
body = "<PUSH_BODY>";
campaignId = <ID_CAMPAIGN>;
----------
contentState =     {
  driverName = "Anne Johnson";
  estimatedDeliveryTime = 1659416400;
};
---------
id = <ID>;
image = "<PUSH_IMAGE>";
journeyStateId = <JOURNEY_ID>;
layout = basic;
sendingId = <SENDING_ID>;
timezone = "Europe/Madrid";
As you can see, push object has one key called contentState with the json you need to update the live activity manually, but in the userInfo of the remote notification object it is coming too with the name content-state:
alert = "<your push text>";
badge = 0;
"content-available" = 1;
"content-state" =     {
  driverName = "Anne Johnson";
  estimatedDeliveryTime = 1659416200;
  update = 1;
};
"mutable-content" = 1;
sound = default;